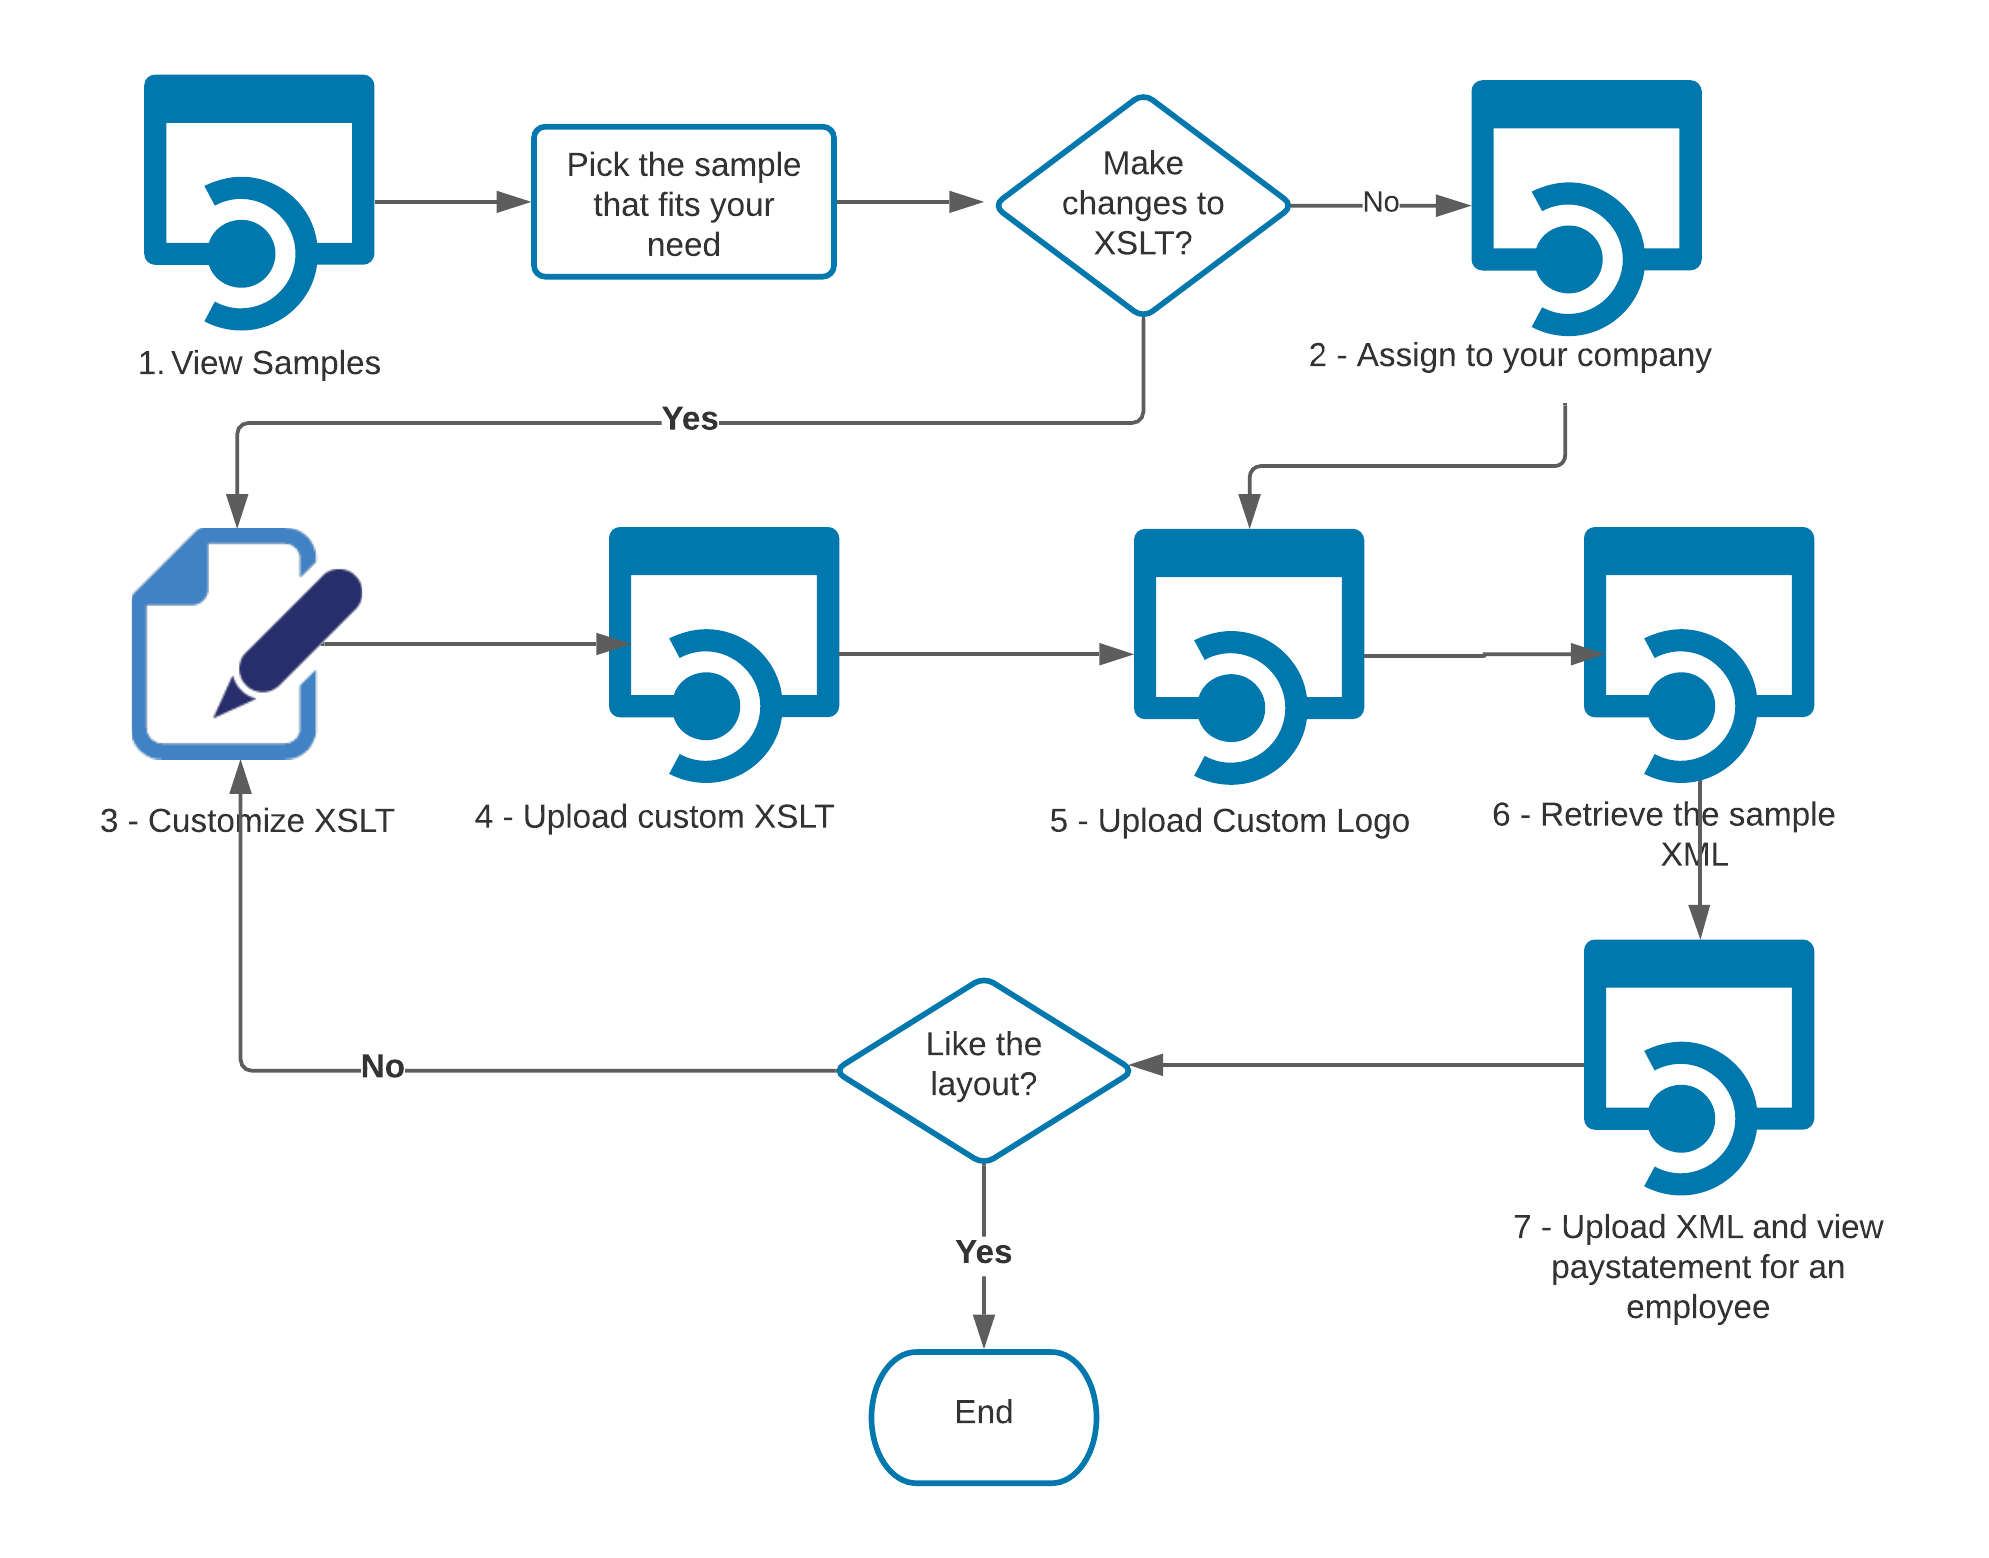
Pay Statement Setup Workflow
The initial workflow of setup is an iterative process that can be repeated until the pay statement is formatted as desired.
*Note: All urls mentioned in this document are samples and the actual url will be available once the client subscribes to the product.
Every CIC Plus endpoint will require two headers: authorization and a subscription key. The header information is as follows:
Headers
Content-Type: application/json
Ocp-Apim-Subscription-Key: {subscription key}
Authorization: bearer {token}
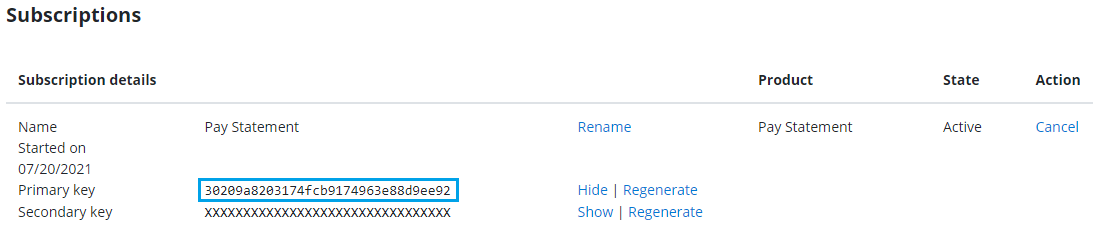
You can learn how to get an authorization token on this page. Subscription key can be found on the Profile page:
1. View Samples
The sample Pay Statements can be viewed by using the endpoint /paystatement/admin/samples. This will provide a list basic pay statement formats that can be directly used by assigning it to your company.
You can view the PDF or image for the pay statement by using /paystatement/admin/samples/pdf . A thumbnail version of the sample can be accessed using /paystatement/admin/samples/thumbnail.
Below is the example GET request sent to the /api/paystatement/admin/samples endpoint. This request will return a list of all the Pay Statement sample formats that CIC Plus offers its clients for a specified culture. We currently offer 3 formats - English (en-US), French (fr-CA) and Spanish (es-MX).
GET https://developer.q1.paperlessemployee.com/api/paystatement/admin/samples
The response will contain the status code. If the request is successful, then the name and description of all the pay statement formats that CIC Plus offers will be displayed. These can then be downloaded and viewed in pdf format.
200 OK
Content-Type: application/json
Response :[ { "name": "cicplus", "description": "the original" }, { "name": "client1", "description": "client1 sample transform" }, { "name": "client2", "description": "client2 sample transform" }]
Below is the example GET request to retrieve a Pdf of the Sample Pay Statement
GET https://developer.q1.paperlessemployee.com/api/paystatement/admin/samples/pdf?sampleName={name}If successful, a Pdf file will be returned with the response as an attachment.
200 OK
Content-Type: application/pdf
Content-disposition: attachment; filename={name}.pdf; filename*=UTF-8''{name}.pdf
Content-length: 122685
2. Assign to your company
If you are satisfied with one of the samples, use the endpoint /paystatement/admin/assignment to assign it to your company. You can then skip to the Upload logo step. Otherwise, you can download a sample and customize it to fit your needs, as described in the next step.
Below is the example POST request sent to the /api/paystatement/admin/assignment endpoint. You can get the sampleformatname from step1.
POST https://developer.q1.paperlessemployee.com/api/paystatement/admin/assignment?sampleFormatName=sample_formatName_fromStep1
The response will contain the status code, and if successful, the selected pay statement format will be assigned to the client. Appropriate error messages will be displayed in case of errors.
200 OK
Content-Type: application/json
Response    : List of success or errors
3. Customize Pay Statement
To customize a pay statement, you will need to download XSLT as a starting point.
The endpoint /paystatement/admin/samples/transform will allow you to do this – pick the sample that most closely matches the format that you want.
Below is the example GET request to access the sample transformation file
GET https://developer.q1.paperlessemployee.com/api/paystatement/admin/samples/transform?sampleformatname=sample_formatName_fromStep1
The response will contain the status code, and if successful, will contain the xslt file.
200 OK
Content-Type: application/json
Response :<xsl:stylesheet version="1.0"...</xsl:stylesheet>
4. Upload modified XSLT
Once the XLST is modified, you can upload it using the endpoint /paystatement/admin/upload/transform. To view your customizations, you can upload pay statement source data (in XML format) as described in the workflow for processing pay statements.
Below is the example POST request to access the sample transformation file
POST https://developer.q1.paperlessemployee.com/api/paystatement/admin/upload/transform?name=nameOfTransform&defaultCulture=en-US
The response will contain the status code, and if successful, the uploaded xslt will be assigned to the client. Appropriate error messages will be displayed in case of errors.
200 OK
Content-Type: application/json
Response    : Returns OK or list of errors
5. Upload Logo
A custom logo can be used on your pay statement. The endpoint /paystatement/admin/upload/logo will allow you to do this.
Below is the example POST request sent to the upload logo endpoint
POST https://developer.q1.paperlessemployee.com/api/paystatement/admin/upload/logo
The response will contain the status code and any applicable messages.
200 OK
Content-Type: application/json
Response    : Returns OK or error message
6. Get Pay Statement XML
Pay Statement XML can be retrieved from the samples.
Below is the example GET request to retrieve the XML
GET https://developer.q1.paperlessemployee.com/api/paystatement/admin/samples/source-data
200 OK
Content-Type: application/json
Response :<G_EMP_DATA>...</G_EMP_DATA>
7. Preview Pay Statement
You can preview what the pay statement looks like by uploading XML data.
POST https://developer.q1.paperlessemployee.com/api/paystatement/admin/preview/pdf
If successful, a Pdf file will be returned with the response as an attachment.
200 OK
Content-Type: application/pdf
Content-disposition: attachment; filename=preview.pdf; filename*=UTF-8''preview.pdf
Content-length: 122747